| ID |
Date |
Author |
Type |
Category |
Subject |
|
3
|
Thu Jun 2 21:55:02 2022 |
Jon | Update | Cameras | FLIR Camera Setup |
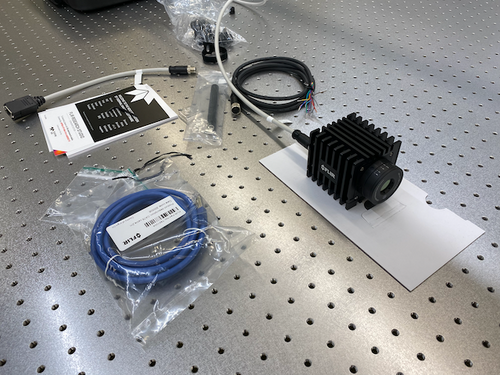
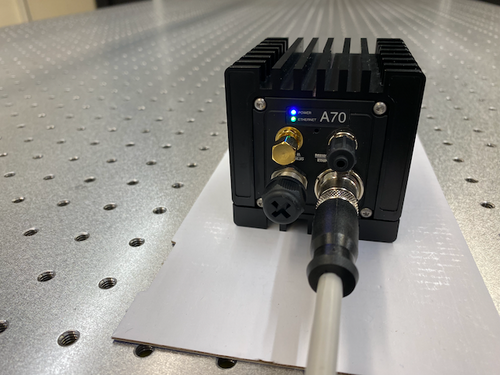
The new FLIR A70 infrared camera has arrived. Tyler and I unpacked it in the lab yesterday. In less than an hour, we succeeded in powering it on and connecting it to the lab network. We have assigned it the static IP address 192.168.1.6.
Online Configuration Portal
The FLIR camera can be configured, as well as stream live data, through a web browser interface. It can be accessed from any workstation on the lab network by navigating in the browser to http://192.168.1.6. The login credentials are stored here (log in with your LIGO.ORG credentials).
Next Steps
The next step is to install FLIR's Python API for controlling and reading out the camera on chimay. The API comes with demo codes which we can use to test the basic connectivity and which will serve as a reference for developing our own Python interface over the summer. |
| Attachment 1: IMG_1473.png
|
|
| Attachment 2: IMG_1474.png
|
|
|
4
|
Fri Jun 3 13:03:33 2022 |
Jon | Update | Cameras | FLIR Camera Setup |
Summary
I have installed the requisite software on chimay for interfacing the FLIR A70 camera in Python. There are two packages required from FLIR:
- Spinnaker SDK, which provides the low-level camera drivers and a C/C++ API.
- PySpin, a wrapper of the Spinnaker library which provides the Python API.
These installations did not work out-of-the-box for Debian 11 (only Ubuntu is officially supported). I had to make several modifications which are documented below for future reference.
This setup has not yet been tested with the camera connected to chimay.
Documentation and Demo Codes
The PySpin package comes with a number of Python demo codes and a complete API reference. These can be found on chimay at the following locations.
- Example codes:
/opt/spinnaker/python/Examples/Python3/
- Python API reference manual:
/opt/spinnaker/python/docs/PySpinDoc.pdf
Installing Spinnaker SDK
Below were the steps required to install Spinnaker on chimay (Debian 11).
- Download the Spinnaker binaries (AMD64 architecture) and copy the tarball to, e.g.,
/home/controls on chimay.
- Unpack the tarball contents and enter the new directory:
$ tar -xf spinnaker-2.6.0.160-Ubuntu20.04-amd64-pkg.tar.gz
$ cd spinnaker-2.6.0.160-amd64
$ sudo apt-get install libavcodec58 libavformat58 \
libswscale5 libswresample3 libavutil56 libusb-1.0-0 \
libpcre2-16-0 libdouble-conversion3 libxcb-xinput0 \
libxcb-xinerama0
qt5-default, which is obsolete in Debian and no longer available via the package manager (that is, its functionality was absorbed into other Qt packages). I was able to find a workaround based on these instructions.
- Install all the dependencies of
qt5-default:
$ sudo apt-get install qtbase5-dev qtchooser qt5-qmake qtbase5-dev-tools
- Manually remove the
qt5-default dependency from the Spinnaker package.
Unpack the spinview-qt_2.6.0.160_amd64.deb package:
$ mkdir tmp
$ cd tmp
$ ar -x ../spinview-qt_2.6.0.160_amd64.deb
$ tar xf control.tar.xz
Open the file control in a text editor and delete the qt5-default dependency from the Depends list.
Then repackage the contents:
$ tar cfJ control.tar.xz control
$ ar rcs ../spinview-qt_2.6.0.160_amd64.deb debian-binary control.tar.xz data.tar.xz
$ cd ..
$ rm -rf tmp
qt5-default dependency.
- Now proceed with running the install script:
$ sudo sh install_spinnaker.sh
This will install the Spinnaker library at /opt/spinnaker. Spinnaker also provides a standalone GUI application, SpinView, which can be executed from the terminal (from any directory) via the command spinview.
Installing PySpin
The main challenge with installing PySpin was that it is currently only supported for Python <=3.8. The system installation on Debian 11 is Python 3.9 and 3.8 is not available within the package manager. Following these instructions, I manually installed a second version of Python (3.8) on chimay, in a way that should not interfere with the system installation.
The Python 3.8 executable is in the system path and can be run only via the command python3.8. It is not symlinked to python or to python3. Those remain linked to the preexisting Python 3.9.
After installing Python 3.8, I proceeded with the installation as follows:
- Download the PySpin package (x86_64 architecture) and copy the tarball to, e.g.,
/home/controls on chimay.
- Unpack the tarball contents and into a new directory:
$ mkdir python
$ mv spinnaker_python-2.6.0.160-Ubuntu20.04-cp38-cp38-linux_x86_64.tar.gz python
$ tar xf spinnaker_python-2.6.0.160-Ubuntu20.04-cp38-cp38-linux_x86_64.tar.gz
- Move the new directory into the Spinnaker installation directory:
$ sudo mv python /opt/spinnaker
$ cd /opt/spinnaker/python
- Install the dependencies:
$ sudo python3.8 -m pip install --upgrade numpy matplotlib
- Finally, install PySpin itself:
$ sudo python3.8 -m pip install spinnaker_python-2.6.0.160-cp38-cp38-linux_x86_64.whl
If this succeeded, you should now be able to enter import the package PySpin as
$ python3.8
>>> import PySpin
without error. |
|
5
|
Mon Jun 6 17:11:48 2022 |
Jon | Update | Cameras | FLIR Camera Setup |
Today I tested the Spinnaker/PySpin software installations (detailed in ELOG #4) with the FLIR camera connected to chimay. It works!
Example codes
I was able to run several of the PySpin example codes. In particular, there is one which connects to the camera and streams live data to a pop-up Matplotlib window that looks very useful. It is called AcquireAndDisplay.py.
When running these, it is important to keep in mind that PySpin requires Python 3.8, which is not the default system version on chimay. So to run AcquireAndDisplay.py, for example, you must explicitly call the correct version of Python:
$ python3.8 AcquireAndDisplay.py
The standard python and python3 aliases are still linked to the system version (3.9), so calling these will result in a PySpin import error.
Git repository
I have set up a git repo for our FLIR camera control code. I have populated it with an Examples directory which contains the PySpin Reference Manual as well as all the example codes (see the README). There is a local copy of this repo on chimay at /home/controls/FLIR.
Other FLIR streaming software
In addition to the PySpin demos, there are several fully developed applications provided by FLIR. While we do not plan to use these long term, they may be very useful for debugging and cross-validation of our Python interface during development:
- Browser interface: From any web browser on the local lab network, navigate to http://192.168.1.6 and log in (credentials here). This interface supports live data streaming as well as full control of the camera settings.
- SpinView: A standalone application provided as part of the Spinnaker SDK. It supports streaming live camera data as well as saving images and videos. It can be launched from the terminal on chimay via the command: $
spinview
- Research Studio: This is FLIR's proprietary software, for which we have a one-year license. It can be launched from the terminal on chimay via the command:
$ FLIRResearchStudio
Permanent cabling
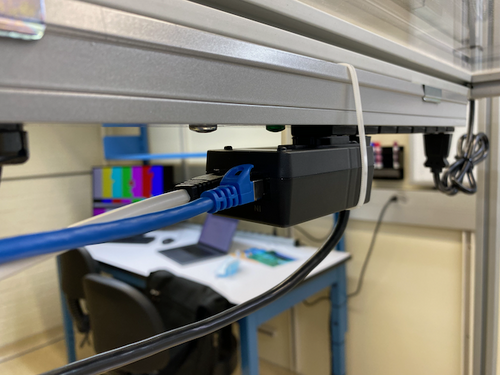
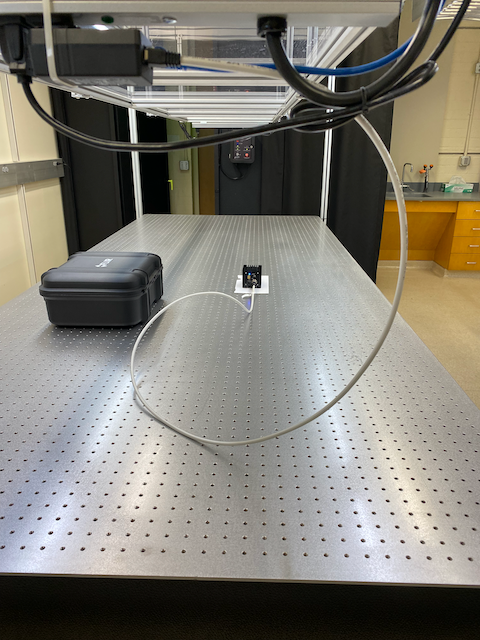
Since everything appears to be working, I ran a permanent Cat 6 cable from the lab switch to the camera's power+I/O adapter. The adapter is plugged into a UPS-protected power strip overhanging the optical table, as pictured below. To prevent the adapter from unplugging itself under its own weight, I attached a zip tie around the adapter to hold it securely in place. |
| Attachment 1: IMG_1480.png
|
|
| Attachment 2: IMG_1481.png
|
|
|
6
|
Tue Jun 21 18:31:49 2022 |
Cassidy and Phoebe | Update | Cameras | IR Absorbing Screen and FLIR Camera Setup |
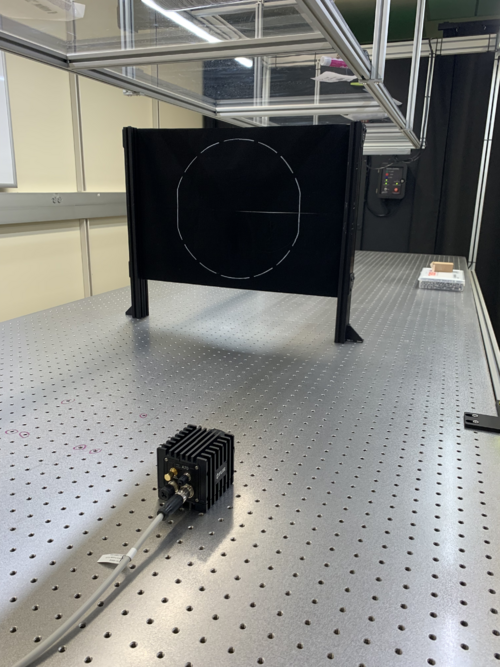
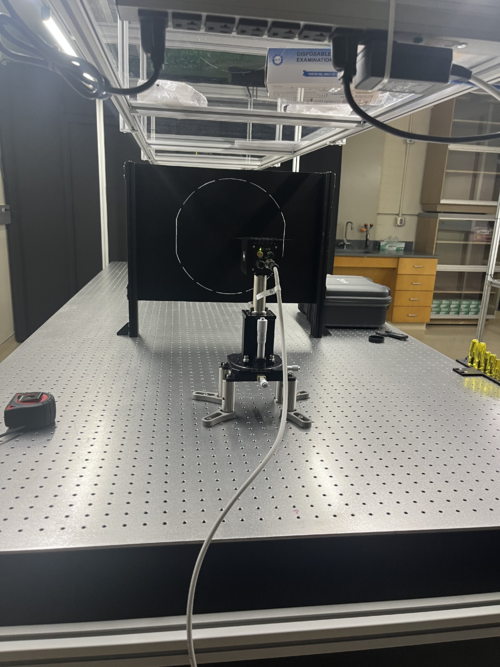
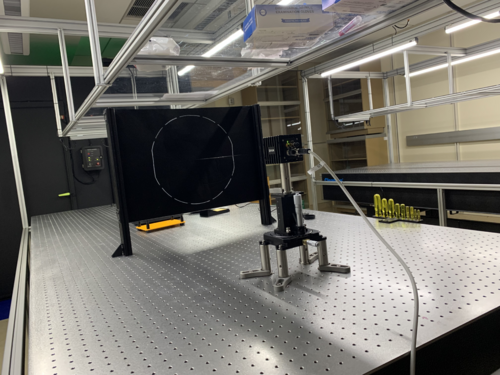
Today we set up the IR absorbing screen and the camera on the optical table, as well as tested that the camera was functioning as expected (picking up heat sources beyond the screen).
Screen Setup
The screen was set up by clamping it between two rectangular posts on each side. First, two posts were set up with 22 in. between them (thus allowing the screen to span a total distance of up to 24 in. when clamped down). To best stabilize the screen and to allow for it to be "pulled" taut by exploiting the give in the L-bracket, the L-bracket was bolted on the outside of the post, along the same axis as the screen itself.
On first attempt, the screen was too thin to be fully clamped between the posts. In order to have it fit snugly, sections of heat shrink tubing was used as a shim at the points where the posts were clamped together. The tubing was slid into the track of one optical post at the desired points. In order to accommodate the shim, the two posts had to be held together, ideally clamped, with the screen and shim in place. Then, the post clamps could be slid into the tracks of the post, moved to the optimal location, and tightened down. This required at least three people: two to tighten one side while the third holds up the screen on the other side. The screen was placed ~1/8" from the edge of the posts and flush with the top.
Camera Stage Setup
Once the screen was in place, the camera stage was set up by placing the XY-Translational with Rotation stage on four 3" optical posts. Then, the z-axis stage was placed in the center of that, with another 3" optical post on top, which was then topped with the camera. This was set and clamped down ~22.5" from the screen. This was about 1" closer than expected based on our theoretical models.
Fine Alignment
We used the visible camera to fine align the screen and to test the setup. Notably, the visible camera is placed below the infrared and thus requires a calibration in order to ensure the two are aligned on the computer image. This can be set by hand using the FLIR proprietary software (FLIR CamWeb) and adjusting the "MSX alignment". The image mode "Thermal MSX" allows both the visible and IR camera to be displayed at once and the difference in their positioning can be seen. We found an offset of ~0.5m to be nearly accurate (note: using this method, although you can get more accurate than this, the displayed value only has one significant figure).
In order to align the camera, we first used the exposed top edge to judge whether the camera was appropriately centered on the screen. We set the rotation as close as possible to being in line by eye, then adjusted the y-axis until the gap on both corners was a similar size, thus indicating that the rotation and y-position were correctly set. Rotationally, the camera required only a refinement of -1/2 degree. The y-axis is set at 1.25. Then, the camera was pulled as far from the screen as possible using the x-axis to allow the screen to be easily centered using the z-axis. Once the outlined test mass was centered, the x-axis was used to bring the camera close until the screen just barely filled the field of view. The x-axis is at 2.25. The z axis is set to it full dynamic range at 10. Unfortunately, the camera is still slightly too tall for the screen, likely requiring the purchase of a new optical post about 0.5in shorter the current one. This interchange will likely require a new fine alignment after.
Basic Imaging Tests
The camera was also focused on the screen based on the manufacturer's printed distance on the camera itself (using 22.5", or 0.572 m). Using the FLIR proprietary software, the camera appears to be in focus in IR (a hand was used as a good focusing tool for this). Additionally, the camera does pick up heat on the other side of the screen. A hand can be lightly seen warming the screen, as can a soldering iron tip. This was a very imprecise visual tool, but does indicate that the camera and screen are working roughly as expected.
Next Steps
A new optical post that is ~2.5" tall should be ordered to replace the one under the camera currently. The heating system also needs to be ordered and set up. Currently we are debating between a parabolic reflector with a hole in the back, and one without, as each would require a different mounting mechanism for the cartridge heater. |
| Attachment 1: IMG_6751.png
|
|
| Attachment 2: IMG_1146.png
|
|
| Attachment 3: IMG_6756.png
|
|
|
8
|
Fri Jul 22 13:20:28 2022 |
Phoebe | Update | | Comsol |
| I will be using comsol until 1:30 pm today. I will be updating the model for the heater mount to be thicker in certain areas, so that it can feasibly be 3D printed. Specifically, the radius of the center cartridge mount has been increased to add thickness to the pipe and the arms of the bridge. This will allow us to print with a much smaller chance for error, as the printer can print objects with a minimum length of 1 mm. |
|
9
|
Tue Jul 26 14:10:35 2022 |
Cassidy | Update | Cameras | Optical Post Replacement and Realignment |
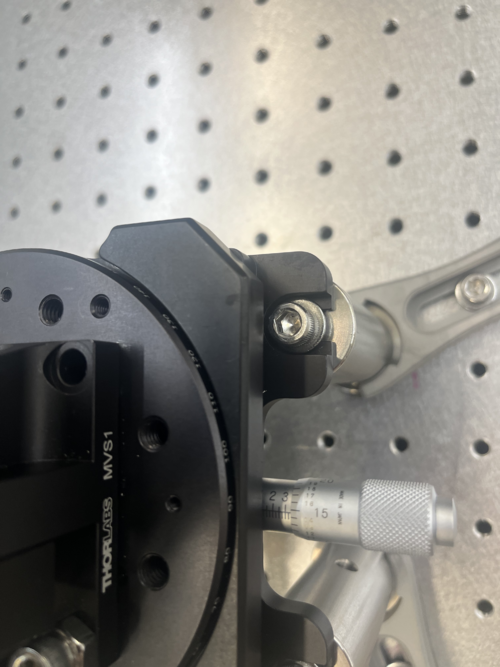
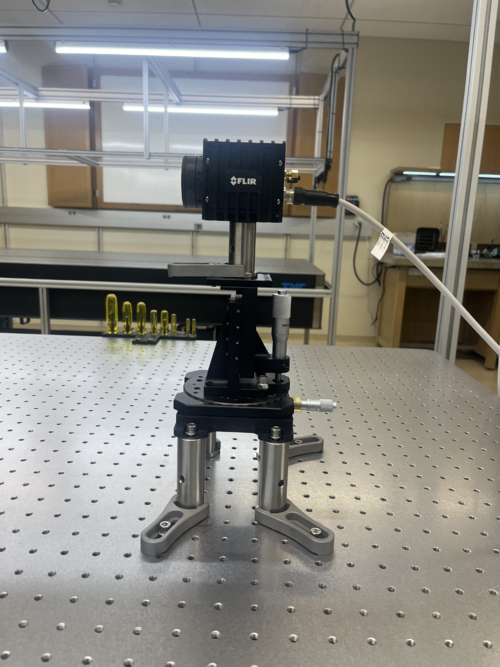
| Today I replaced the 3" optical post that the camera rests on with a 2" optical post in order for the screen to correctly fill out the camera's FOV. The 3" post is now in the glass optics cabinet next to the FLIR camera configuration box, wrapped in the protective materials from the 2" post for safekeeping.
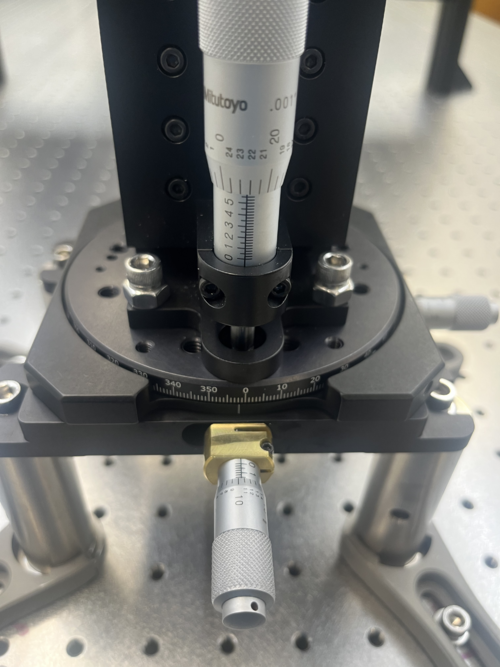
There were no issues with the physical replacement of the post, except that the fork clamp on the post needs to be on one of the perpendicular, not diagonal, axes in order to be secure. I chose the front axis (towards the screen) as before in order to easily access the alignment knobs.
To align, I followed the same process as last time except for a more purposeful original rough alignment. For alignment purposes, the visual camera was used. For the first rough alignment, I pulled the camera as far back as possible on the x axis (with the z axis roughly centered), then moved the entire stage setup back until I could just see both the top and bottom edge of the screen. Then, I set the z-axis to an extreme in order to use the edge of the screen to align the rotational and y-axis pieces for the fine alignment.
For the fine alignment, starting with the z and x axis at extremes, I began by aligning the rotational axis. To do this, I used the gaps between the top of the screen and the camera window on the far left and right of the image. When these gaps were equal I knew the rotation was adequately set. Then, I set the y-axis so that the pattern was centered. If the gaps were no longer even, I redid the rotation alignment and ditto with the y axis until both were set. This resulted in a rotation of about two degrees and a y axis at just under 3.5.
To set the z and x axis, I centered the z-axis using the top and bottom of the screen, which should both be visible if the rough alignment was done correctly. Then, I adjusted the x axis by pushing it forward until the top and bottom of the screen were just out of the frame. As with the rotational and y-axis, I iteratively fine tuned the x and z axis until both the image was centered in the z axis and only the screen was in view. This resulted in a z-axis value of just over 5.5 and an x axis value of nearly 1.75.
Pictures are included of all alignment knobs and the new post/stage setup! |
| Attachment 1: YAxisAlignment.png
|
|
| Attachment 2: XRotZAlignment.png
|
|
| Attachment 3: NewOpticalPost.png
|
|
|
11
|
Mon Oct 3 17:21:39 2022 |
Cao | Update | TCS | Inspection of macor parts |
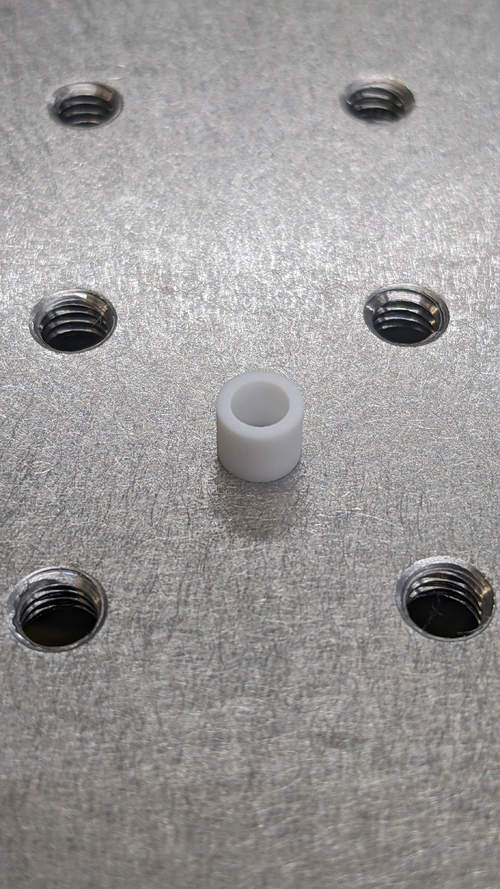
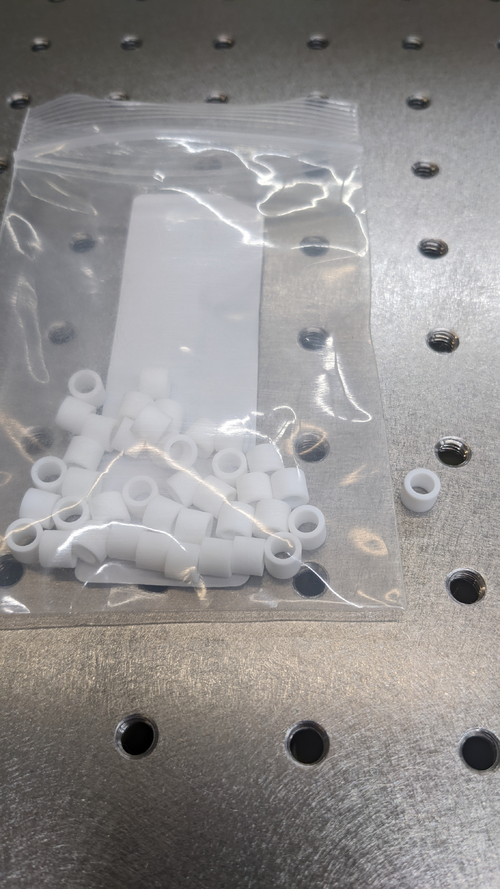
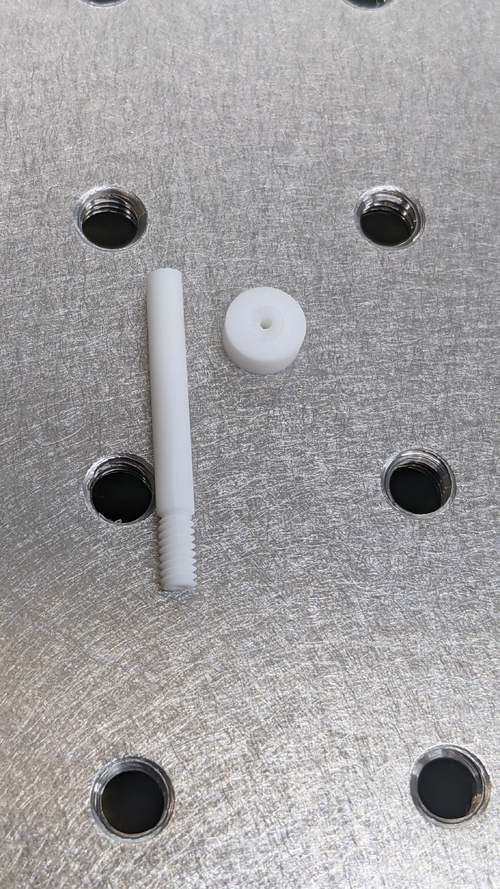
The macor parts arrived and inspected today. These include:
- Macor spacer (drawing:
LIGO_Redesign_Macor_Spacer_Drawing_v4.pdf attached below), quantities: 40
- No defects, damages observed
- Parts are free from grease/ machining fluid
- Wall thickness of 1 mm appear to provide sufficient stiffness to part
- Images of parts:
Macor_spacer_0.jpg, Macor_spacer_1.jpg
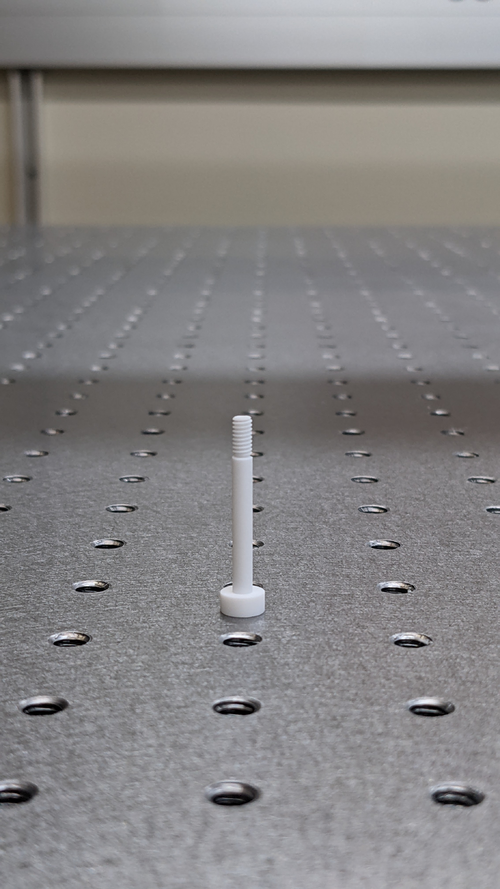
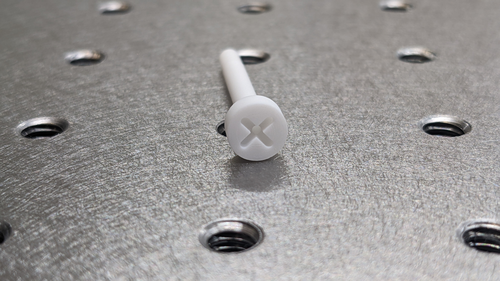
- Macor 5-40 UNC screw (drawing:
LIGO_Redesign_Macor_Screw_Drawing_v6.pdf attached below), quantities: 20
- One screw broke, location of break: should edge between head and shaft (see image
Macor_screw_5.jpg )
- All other screws look ok, no damage observed, clean surface overall
- Images:
Macor_screw_0.jpg , Macor_screw_4.jpg
|
| Attachment 1: LIGO_Redesign_Macor_Spacer_Drawing_v4.pdf
|

|
| Attachment 2: Macor_spacer_0.jpg
|
|
| Attachment 3: Macor_spacer_1.jpg
|
|
| Attachment 4: LIGO_Redesign_Macor_Screw_Drawing_v6.pdf
|

|
| Attachment 5: Macor_screw_5.jpg
|
|
| Attachment 6: Macor_screw_0.jpg
|
|
| Attachment 7: Macor_screw_4.jpg
|
|
|
12
|
Mon Nov 28 18:10:23 2022 |
shane | Update | ELOG | Particle counts in the clean room |
| Particle count stats for the clean room Nov 28, 2022:
Took 10 sample runs in each of 5 regions in the clean room (5 runs per region with a person inside the clean room for the measurement, and 5 runs per region without anyone in the clean room for the measurement), for a total of 50 samples taken. Sample time was 60 seconds. Overall clean room average particle count for the size ranges are as follows:
0.3 micrometers- 3405.76 (room occupied), 974.92 (room empty)
0.5 micrometers- 409.72 (room occupied), 409.72 (room empty)
1.0 micrometers- 1102.2 (room occupied), 282.6 (room empty)
2.5 micrometers- 692.32 (room occupied), 183.68 (room empty)
4.0 micrometers- 254.28 (room occupied), 84.72 (room empty)
5.0 micrometers- 141.24 (room occupied), 84.72 (room empty)
7.0 micrometers- 56.48 (room occupied), 84.72 (room empty)
10.0 micrometers- 42.36 (room occupied, 42.36 (room empty)
More statistics (including individual stats on the 5 regions within the clean room) attached. |
| Attachment 1: clean_room_particle_counts_11_28_-_Sheet1.pdf
|

|
|
15
|
Wed Jan 18 22:06:05 2023 |
Julian | Update | ELOG | Cleanroom Update |
| I wiped down all the inner walls of the cleanroom using alcohol wipes, as per Cao's instruction. |
|
16
|
Mon Jan 23 17:26:15 2023 |
Peter Carney | Update | General | Oven cleaning |
| Aiden and Cao
Turned on the oven to 120 deg C for 12 hours. After 12 hours, put it at 200 deg C for 48 hours. |
|
17
|
Thu Jan 26 18:58:25 2023 |
Aiden | Update | General | Oven Heating |
| Aiden cleaned the oven with methanol again and set the oven to 260 degC for 12 hours. |
|
18
|
Fri Jan 27 18:44:31 2023 |
Julian | Update | General | Vacuum Chanmber Cleaning |
| I used the IPA wipes to wipe down the inside of the chamber the best I could. I cleaned the main chamber but not any of the connecting joints. When I finished I did a once over with a fresh wipe and found no residue. |
|
21
|
Sat Feb 4 17:01:03 2023 |
Peter | Update | VLC Electronics | Laser Data |
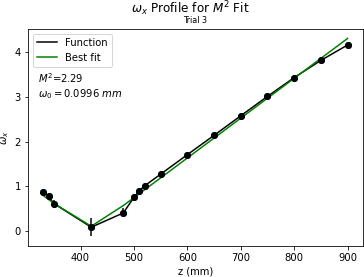
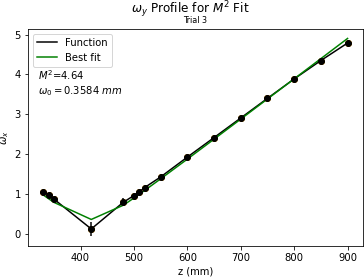
| Peter and Ryan took laser beam data. Configuration: 100mm focal length lens is ~100mm from lens. 150mm focal length lens is ~200mm from first lens. Beam waist is ~420mm from second lens.
Beam waist is very small still. Had to input large amounts of error in data collection. Took width data successively at points near waist and at >= Rayleigh range. Plots are shown below.
Key points:
Took a while to figure out optimum configuration for lenses to be placed so that an accessible beam waist could be obtained.
Beam waist is still very small. May need to do an ABCD calculation to see if there is anything bigger that can be obtained. |
| Attachment 1: OmegaX_M2_Fit_3.png
|
|
| Attachment 2: OmegaY_M2_Fit_3.png
|
|
|
22
|
Mon Feb 6 20:02:32 2023 |
Julian | Update | General | Cleanroom Update |
| I wiped down the main table (including frame, legs, and transparent shelf) and workbench using alcohol wipes. Once I cleaned all of the surfaces, I used the Hepa vacuum to pick up any fallen debris. |
|
25
|
Fri Feb 10 15:15:30 2023 |
Aiden | Update | General | Bagging First Batch |
| Aiden Bagged and Tagged the first batch of stainless steel parts shown on the google spread sheet.
1. Removed two parts from the oven.
2. Place them in the ESD bag.
3. Seal bag with Kapton Tape.
4. Create label including part name and number underneath it.
5. Put label onto the side of the bag where it is not sealed with tape.
6. Placed bagged items into clean room on work table.
ps. total bags in first batch = 4 |
|
27
|
Sat Feb 11 00:17:27 2023 |
Julian | Update | General | Vacuum Chamber Cleaning |
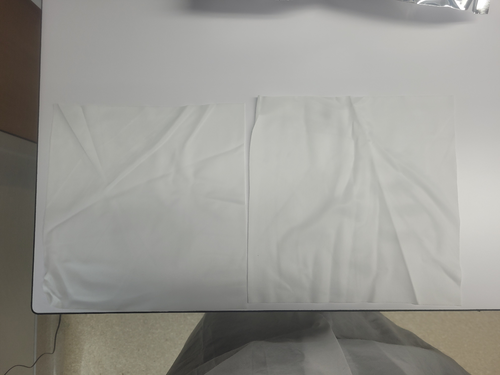
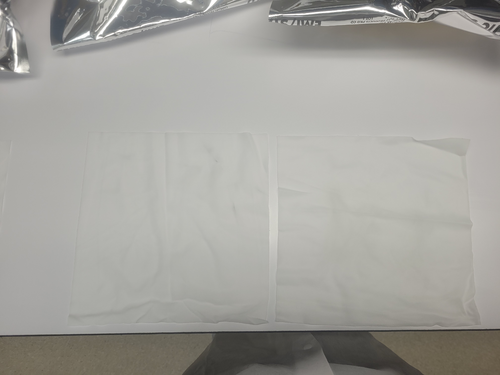
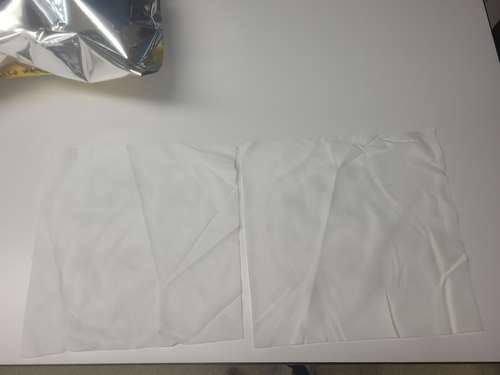
| Today I finished wiping down the rest of the vacuum chamber, specifically focusing on the connecting ports and outside surface of the chamber. When I was finished, I test wiped every surface of the chamber and took pictures confirming the current state of cleanliness; Attachment 1 "Wipes for top and bottom of chamber's upper lip." Attachment 2 " Top and bottom of chamber's lower lip." Attachment 3 "Inside and Outside main chamber." Attachment 4 "Inside connecting ports." |
| Attachment 1: 20230210_181404.jpg
|
|
| Attachment 2: 20230210_181424.jpg
|
|
| Attachment 3: 20230210_181541.jpg
|
|
| Attachment 4: 20230210_181606.jpg
|
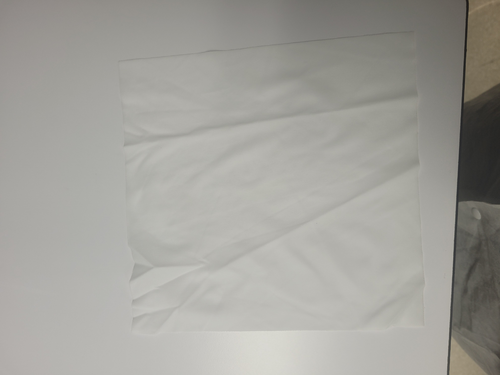
|
|
28
|
Sat Feb 11 17:09:29 2023 |
Shane | Update | General | clean room particle counts 2/10/23 |
| Took a round of clean room counts after the latest clean of vacuum chamber on Feb 10. Used 60 second sample time, 5 samples for each of the 5 zones. Plots attached for both occupied clean room (one person inside, attachment 1) and unoccupied clean room (empty attachment 2), as well as the raw data from the particle counter (attachment 3). |
| Attachment 1: occupied2.10.23.pdf
|

|
| Attachment 2: unoccupied2.10.23.pdf
|

|
| Attachment 3: particlecounts2.10.23.PDF
|

|
|
30
|
Fri Feb 17 19:12:39 2023 |
Aiden | Update | General | Clean and Bake batch 3 |
| Bagged and Tagged batch 2 parts by placing no more than two parts per ESD bag then taped them with kapton tape and tagged them with their name and part number. Than placed them inside the clean room on the work bench. Total of 3 Bags used.
For Batch 3- Cleaned all copper gaskets with liquinox for 10 minutes, dried them off with nitrogen, then placed into oven where the are currently undergoing the following steps;
1. Ramp to 100 deg C in 15 minutes.
2. Dwell at 100 degC for 30 minutes.
3. Ramp to 175 degC in 30 minutes.
4. Dwell at 175 degC for 24 hours.
5. Turn off and cool down to room temperature.
To see the specific parts in batches 2 and 3 refer to the clean and bake data sheet. https://docs.google.com/spreadsheets/d/19gnv1q9l64gxnq76KfcXizbqShJfK0ayn2Js1SiAZok/edit?skip_itp2_check=true#gid=1549161924 |
| Attachment 1: IMG_4126.jpg
|
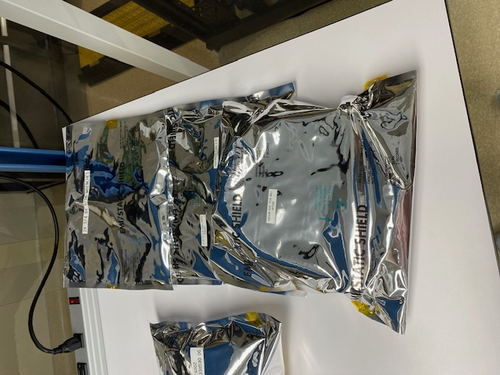
|
| Attachment 2: IMG_4125.jpg
|
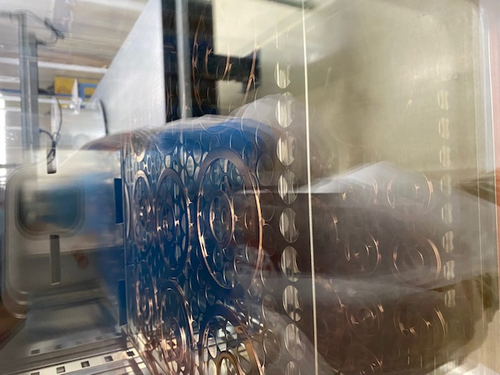
|
|
32
|
Thu Feb 23 13:32:55 2023 |
Shane | Update | General | Clean room floor particle counts |
| Here are the counts from the clean room floor today. The counts should be dated- the ones from today (2/23/23) are the last 8 in the chart. The first set of 2 measurements from today were under the table by the clean room entrance, the next two were under the table by the vacuum chamber, the next two were on the floor by the vacuum chamber lid, and the last two were on top of the table for comparison. All measurements were taken using 2 minute sample time. |
| Attachment 1: 2.23.2023.pdf
|

|
|
33
|
Thu Feb 23 21:12:33 2023 |
Julian | Update | General | Vacuum Chamber Cleaning |
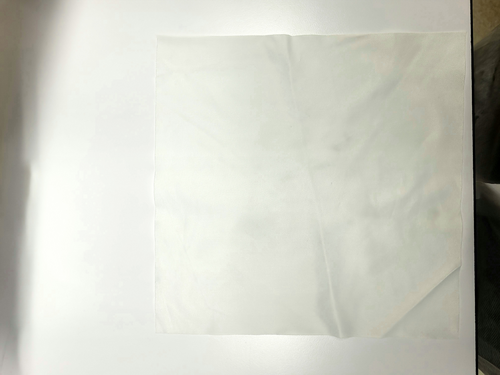
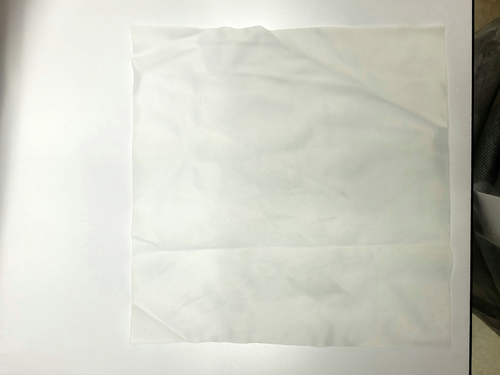
| Today I was able to come in and wipe down both sides of the vacuum chamber lid using the regular alcohol wipes and also wipes that were left to dry in the fume hood then saturated with acetone. I managed to get a good amount of the residue off both the inside and outside surfaces of the lid, then did a test wipe of both sides using acetone-soaked wipes; pictures of the wipes are attached below. Once I finished with the lid, I used another acetone wipe to test wipe the inside of the vacuum chamber. The inside is still giving off residue, but very minimally, a photo for this is attached as well. |
| Attachment 1: ChamberLid_inside.jpg
|
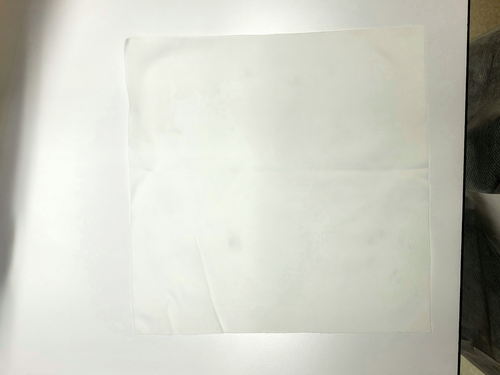
|
| Attachment 2: ChamberLid_outside.jpg
|
|
| Attachment 3: VacuumChamber_inside.jpg
|
|
|
34
|
Mon Feb 27 17:09:04 2023 |
Pamella | Update | General | Vacuum Chamber Cleaning |
| Pamella and Julian finished cleaning the interior of the chamber, chamber lid, and the table. We found some black residue on the side of the table but not sure what the issue is. A picture of the specific area of the table that is giving off the black residue is attached below. The next step from here would be to flip the chamber on its side and finish the cleaning the exterior. |
| Attachment 1: Side_of_Table.jpeg
|
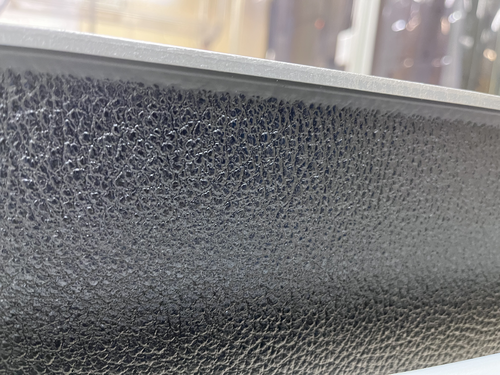
|
| Attachment 2: Wipes_from_table.jpeg
|
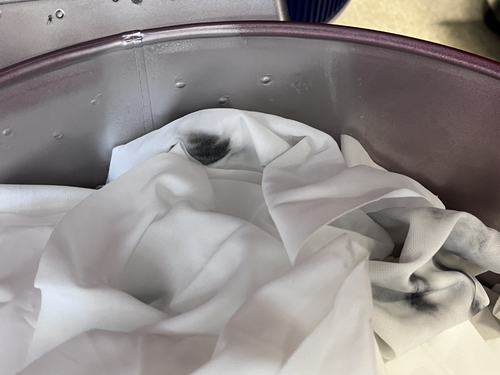
|
|
35
|
Tue Feb 28 13:53:17 2023 |
Pamella | Update | General | Vacuum chamber cleaning |
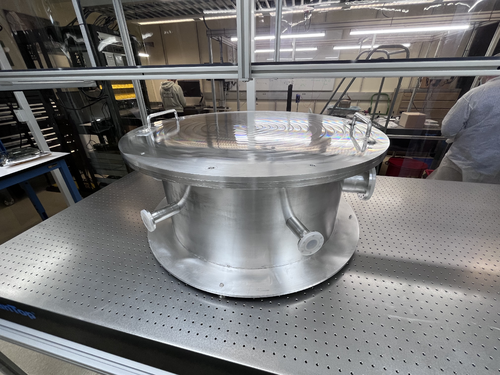
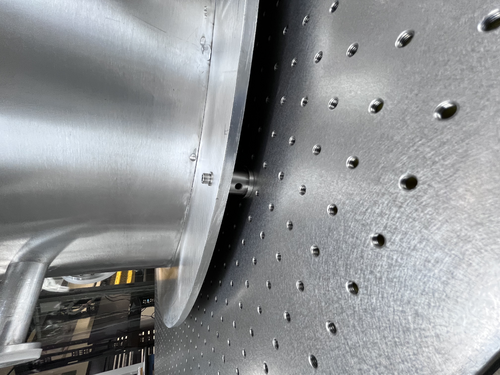
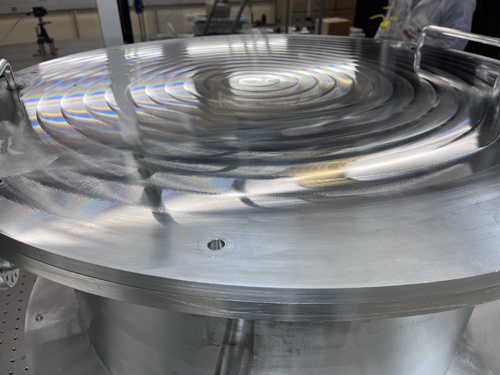
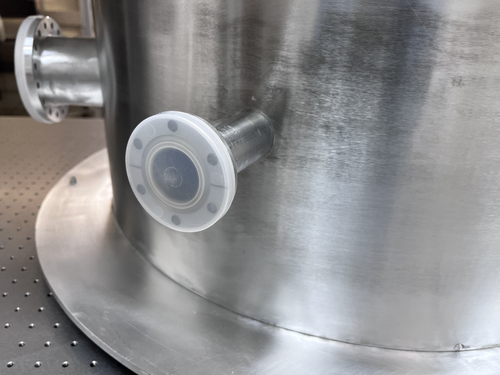
| Pamella, Dr. Richardson and Dr.Cao finished checking and cleaning the interior of the chamber, chamber lid, and exterior of the chamber with Vectra Alpha wipes, IPA and in some parts we used acetone . We flip the chamber and put chamber on the table again. A picture of the specific situation is attached below. The next step from here would be to finish the cleaning the floor .
The black residues on the side of the table probably is some reaction between the Vinil and the wipes so is not necessary cleaning this part deeply. |
| Attachment 1: EE5E0296-D362-4EA6-B482-85A629D93B46.jpeg
|
|
| Attachment 2: 4C0AA805-667E-45AD-8704-03389BD63489.jpeg
|
|
| Attachment 3: 51CE3D1E-F48E-4F57-8450-8F58C27154BB.jpeg
|
|
| Attachment 4: 58ADE656-52AD-4F0E-88BA-B993F977A519.jpeg
|
|
|
36
|
Tue Feb 28 19:31:05 2023 |
Peter | Update | VLC Electronics | 532 M2 Measurements |
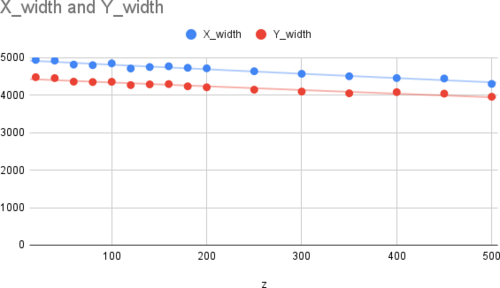
| Took M2 measurements today. Configuration: Lens 1 (f = 50mm) at 0mm. Lens 2 (f = 150mm) at 200mm, camera at 350mm. The laser beam was being moved in -z direction on track (so further away from the first lens). Quick data shown in the sheets plot. Not a real fit. I was trying to see where the beam waist was if there even was one. Seems that it is much further than we have room for on the track. Will need to come back and take more data.
I suggest maybe Dr. Richardson or Cao come and see the configuration in person and how the beam diverges for themselves on the detector card. Maybe they can offer pointers to make this go smoother. |
| Attachment 1: X_width_and_Y_width.png
|
|
|
37
|
Tue Feb 28 19:33:51 2023 |
Peter | Update | | 532 M2 Measurements |
| Y axis of plot in units of micrometers. X axis in units of millimeters. |
|
41
|
Thu Mar 2 20:53:56 2023 |
Julian | Update | General | Cleanroom Update |
| Today Pamella and Julian began the final cleaning of the cleanroom, starting with the HEPA vacuuming and mopping then wiping down every surface of the laser table. We wiped the main tabletop as well as the legs, but we were unable to completely wipe down the upper frame of the table before we had to leave. For next steps, Julian will come in on Friday and finish cleaning the frame, then both of us will come in on Monday to finish the final cleaning. |
|
43
|
Sat Mar 4 00:34:46 2023 |
Julian | Update | General | Cleanroom Update |
| Today I was able to finish cleaning the frame of the laser table, and for good measure I wiped down the tabletop and exterior of the vacuum chamber when I was finished. I was also able to go through and wipe down the bags containing the vacuum parts as well as the tabletop of the workbench. |
|
45
|
Mon Mar 6 18:48:43 2023 |
Pamella | Update | General | Cleanroom update |
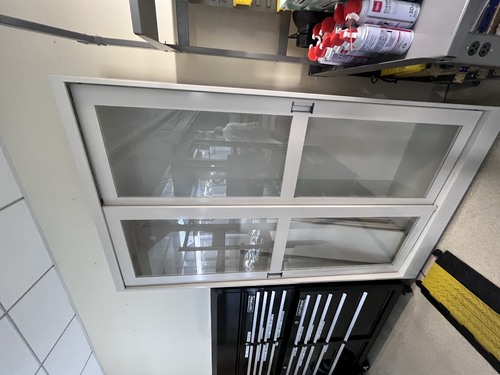
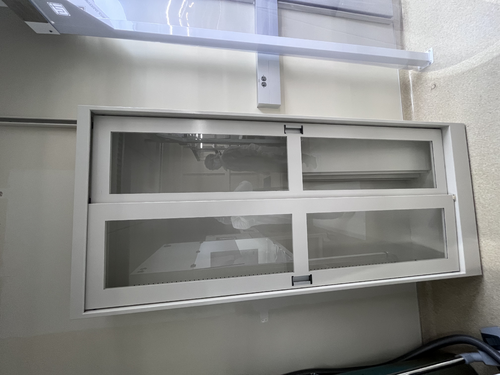
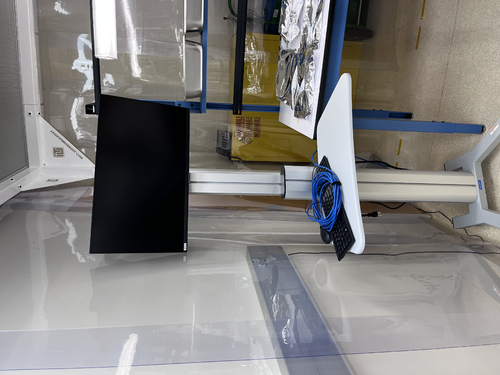
| Today Pamella and Julian finished cleaning of the new lab cabinets. Also we wiped the computer and put inside the cleanroom so now the computer is not move out side anymore.
We saw some dirty parts in the cleanroom floor again and is possible for the next step we should be clearing the floor one more time.
Possible is necessary order more IPA wipes for keep cleaning in nexts weeks.
A photos of the cabinets and the computer are attached below. |
| Attachment 1: 203863E0-106A-465E-8D9C-461B0358FB60.jpeg
|
|
| Attachment 2: 779F360D-CAD0-4C49-AE0B-973F97F6D099.jpeg
|
|
| Attachment 3: 276B9F0C-6661-441F-AD34-D79DA61E1FC3.jpeg
|
|
|
46
|
Wed Mar 8 18:35:52 2023 |
Pamella | Update | | Lab cleaning |
| Today Pamella finished cleaning of the cleanroom, starting with the HEPA vacuuming, mopping and clearing all floor with IPA wipes.
Also Pamella and Julian finished cleaning of lab floor, starting with the HEPA vacuuming and mopping.
Shane and Pamella wiped down every surfaces of the laser table, computer table and the table with the vacuum pieces inside the cleanroom.
Shane, Peter, Tayler, Pamella and Julian then wiped down every surface of the laser table outside the cleanroom. We wiped the main tabletop as well as the legs and all parts for the table. We wiped the computer desk, the boxes, the cabinets and every part outside the cleanroom. For now we finished the lab cleaning. |
|
48
|
Thu Mar 9 12:03:59 2023 |
Peter | Update | VLC Electronics | 532 M2 Measurements |
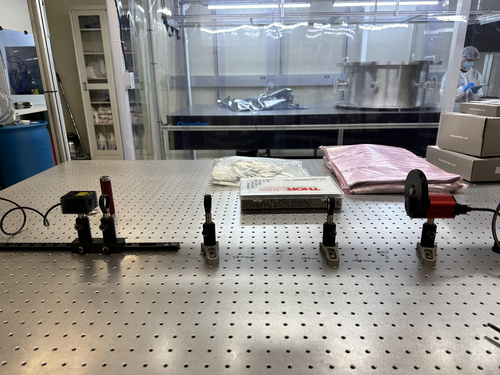
| Took more M2 Data today. Picture of the optical set up is shown below. lens1 f = 100mm, lens2 f = 50mm, lens3 f = 150mm. There was a nice converging/diverging beam profile, and the beam waist was able to be read by the camera. I took as much data as I could before clipping loss. The M2 value is quite high. |
| Attachment 1: OmegaY_M2_Fit_3.png
|

|
| Attachment 2: OmegaX_M2_Fit_3.png
|

|
| Attachment 3: optical_setup.jpg
|
|
|
49
|
Thu Mar 9 13:51:42 2023 |
Shane | Update | General | Clean room counts 3/9/23 |
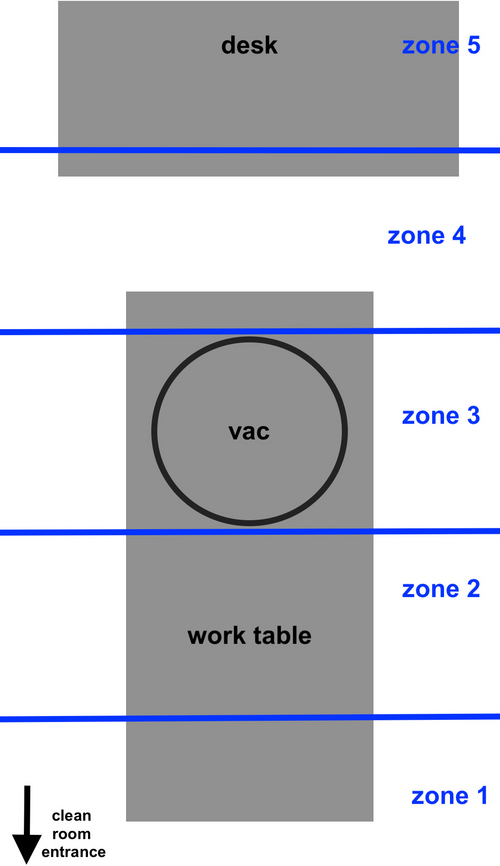
| Here's the clean room counts from this morning. Also attached is rough diagram of where the five zones are in the clean room. Counts taken with 2 minute sample time, three samples in each zone. |
| Attachment 1: particlecounts3.9.23.pdf
|

|
| Attachment 2: clean_room_zones.JPG
|
|
|
50
|
Fri Mar 10 12:08:09 2023 |
Peter | Update | VLC Electronics | 532 M2 Measurements |
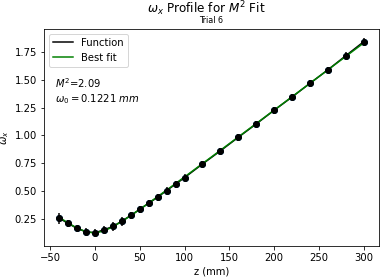
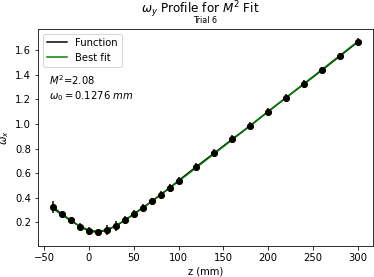
| Took more M2 laser data today. The configuration is the same as before except now the beam camera is the only component moving. Pictures can be seen below. The beam shape in x and y is very consistent with low error. However, the M2 value is still a bit high. |
| Attachment 1: OmegaX_M2_Fit_4.png
|
|
| Attachment 2: OmegaY_M2_Fit_4.png
|
|
|
54
|
Wed Mar 22 15:25:00 2023 |
Shane | Update | General | Clean room recertification particle counts |
| Attached are the five zone particle measurements for the clean room now that the fan speeds have been set to MEDIUM. 2 min sample time, 3 samples per zone. The occupied clean room measurements were unusual in that they generally got larger towards minute 6 instead of settling and going to zero, and for this reason didn't stay beneath the class 5 requirement at the end of the samples. The unoccupied counts look more similar to what was expected, and generally settle under the class five requirement. |
| Attachment 1: counts3.22.23.pdf
|

|
|
55
|
Thu Mar 23 18:40:08 2023 |
Julian | Update | General | Cleanroom Update |
| Today Pamella and I came in to Hepa vacuum and mop the floor of the cleanroom for general maintenance. |
|
57
|
Fri Mar 24 13:36:17 2023 |
Pamella | Update | General | Clean and Bake batch 10 |
| Today I bagged and tagged batch 10.
I wiped the RGA vacuum component for around 25 minutes after that I bagged and tagged this part and put inside the cleanroom. The RGA vacuum component have a big size and because off that i used the big bag.
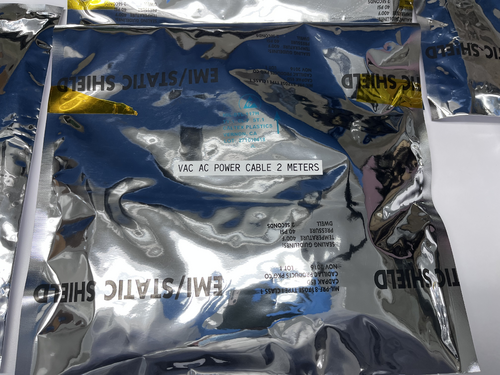
I wiped one power cable (2 meters), bagged and tagged that and inside the cleanroom.
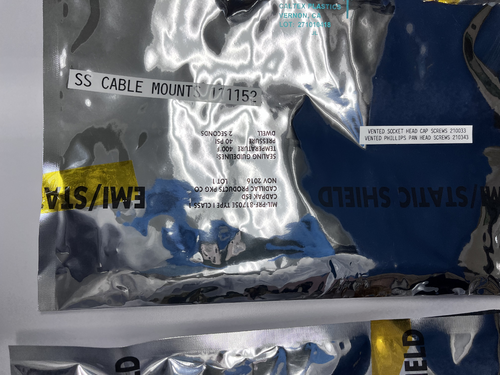
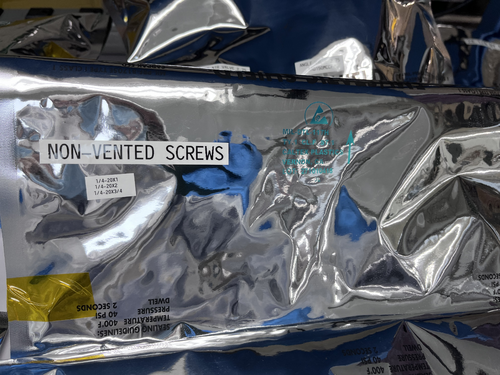
For the parts in the oven, a bunch of screws, I bagged and tagged the screws and put inside the cleanroom.
I put photos below about this process. |
| Attachment 1: 260AEB73-02D0-4635-93B3-B2EB3269FB84.jpeg
|
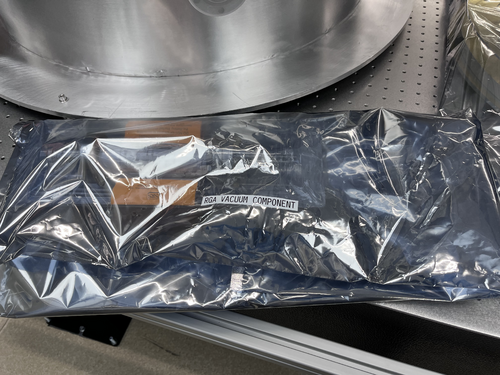
|
| Attachment 2: 59FD199A-A444-439A-8D51-C242B65BBECD.jpeg
|
|
| Attachment 3: 9A48A0EE-5EFE-409D-ACC0-17011F6F7EBF.jpeg
|
|
| Attachment 4: 950F85B7-D304-4724-AB3D-B606E422F1E3.jpeg
|
|
|
58
|
Wed Mar 29 16:00:36 2023 |
Pamella | Update | Cameras | FLIR project |
|
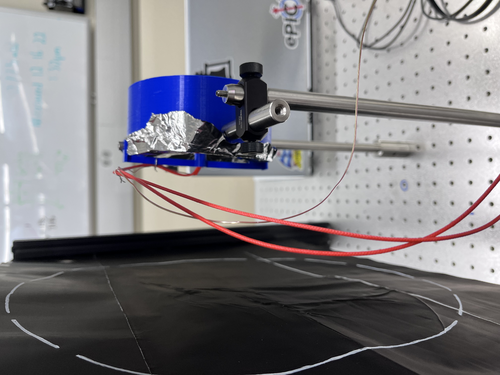
Today Pamella and Tyler started work in the updates for the FLIR project.
We trie for the first time cover the mirrors with aluminum foil and run the code with this.
We work in figured out how the python codes works with real datas.
To do:
Understand how get the real datas and how to compere that with the old datas.
Starting test with the FLIR and mirrors with aluminum foil in with the power on.
Testing the FLIR camera more times with the mirrors covered with aluminum foil. |
| Attachment 1: 15D13FE3-48A9-4ACF-9422-07032DD8D028.jpeg
|
|
|
59
|
Fri Mar 31 14:23:13 2023 |
Pamella | Update | General | Clean and bake batch 11 |
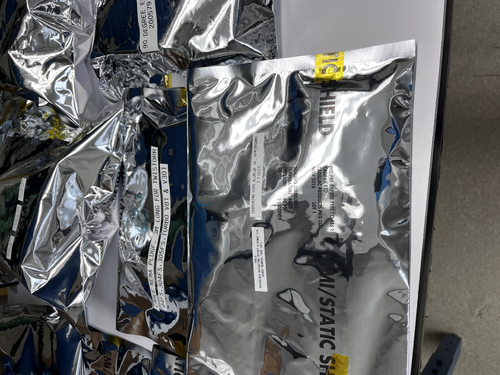
| Today I bagged and tagged batch 11. I wiped the some tools: Centering ring alum( 2 pieces), reversible ratcheting, gasket removal (CF). After wiped that I bagged and tagged this parts and put inside the cleanroom.
Also I wiped one power cable (3 meters), bagged and tagged that and inside the cleanroom.
I put photo below. |
| Attachment 1: 4AC705B8-D906-47E3-86E4-49E4967910E7.jpeg
|
|
|
61
|
Tue Apr 4 09:39:58 2023 |
Peter | Update | VLC Electronics | 532 M2 Measurements |
| Final M squared measurements were taken Wednesday, 3/29/23 by Peter and Ryan Hinosawa. 5 separate sets of data were taken, and upon discussion, we declared the plots shown below in attachment 1 and 2 as the final plots of our M squared measurements.
The optical design of the M squared measurement process is given in attachment 3. The laser and three lenses shown below are mounted on the optical table. The track is placed behind the third lens, and the camera is moved along the track to take successive measurements of the beam's width. This will allow us to see a change in the beam's width over its propagation direction.
The raw data is given in attachment 4 as a Beam_Data_8_3lens.txt file. This is eventually what gets used to generate the plots shown below.
The code to run the analysis on these measurements (as well as analysis on the Gaussian intensity profile fitting) can be found:
git@git.ligo.org:uc_riverside/visible-light-cavity.git |
| Attachment 1: OmegaY_M2_Fit_8.pdf
|

|
| Attachment 2: OmegaX_M2_Fit_8.pdf
|

|
| Attachment 3: M2_Measurements_Set_Up.svg
|

|
| Attachment 4: Beam_Data_8_3lens.txt
|
z-z0	x_width	y_width	x_error	y_error
-50	267	304	30	30
-40	227	261	30	30
-30	192	223	30	30
-20	167	194	30	30
-10	153	169	50	50
0	149	154	50	50
10	166	152	50	50
20	198	169	50	50
30	233	195	50	50
... 17 more lines ...
|
|
62
|
Tue Apr 4 09:53:37 2023 |
Peter | Update | VLC Update | Laser intensity/polarization drift measurements |
| The set up for the next round of beam characterization measurements has begun. The beam is initially passing through a half waveplate, is split at a polarizing beam splitter, and then stirring mirrors are used to properly aim the beam into photodiodes (not yet installed). This is the current configuration of the set up. |
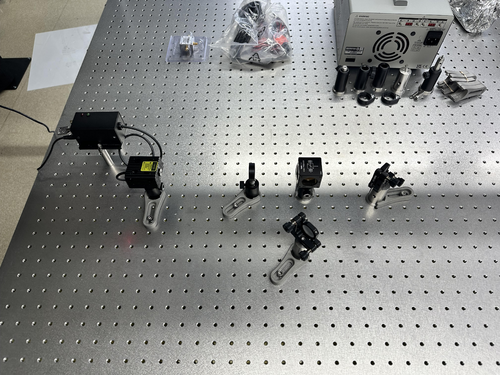
| Attachment 1: initial_Intens_measure_set_up.jpg
|
|
|
63
|
Tue Apr 4 16:43:53 2023 |
Jon | Update | VLC Electronics | Additional Thorlabs PDA10A2 |
| I ordered a second PDA10A2 and mounting post + spacer (which puts the aperture at the VLC's standard 3" beam height). These arrived today and I delivered them to the lab. They are sitting on the VLC table near the laser. |
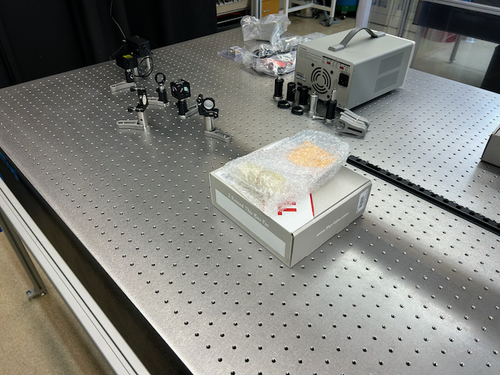
| Attachment 1: PDA10A2.png
|
|
|
64
|
Tue Apr 4 16:52:08 2023 |
Jon | Update | Cleanroom | Particle counter docking station |
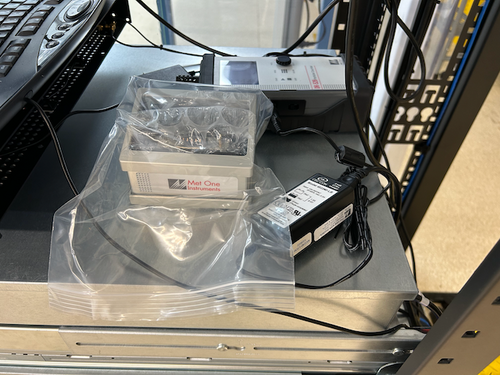
| Due to the problems we have encountered trying to serially communicate directly with the Met One DR-528 particle counter, I went ahead and ordered the add-on communications/charging dock. The dock "ethernetizes" the serial communications by wrapping them in TCP packets and transmitting them over the lab network. This will allow our Python code to communicate using the standard Internet sockets package, rather than PySerial, PyNut, etc.
the docking station arrived today and I delivered it to the lab. I left it laying next to the particle counter in the electronics rack. |
| Attachment 1: Met_One_Dock.png
|
|
|
65
|
Thu Apr 6 10:20:43 2023 |
Peter | Update | VLC Update | Laser intensity/polarization drift measurements |
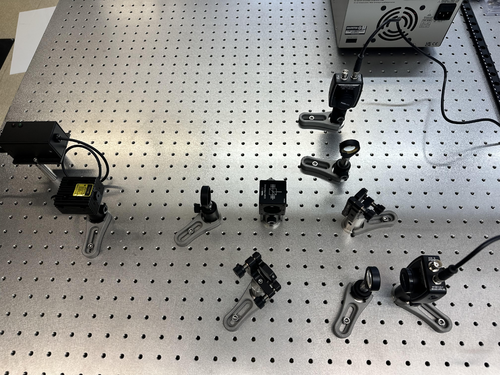
| More optical components were added to the optical set up for laser intensity / polarization drift measurements. Both lenses and both PDs were added to the configuration, as seen in the image below. The beam is already well aligned into the center of both of PDs, and focused nicely by the lens.
Both PD's take BNC connecting cables, and the Red Pitaya takes SMA connecting cables. Since we are currently without a BNC to SMA cable, and we do not want to cut, strip, and crimp what we have, then measurement process cannot proceed until we get the cables. |
| Attachment 1: Optical_Setup_4-6-23.jpg
|
|
|
66
|
Fri Apr 7 09:48:09 2023 |
Pamella | Update | General | Clean the system parts |
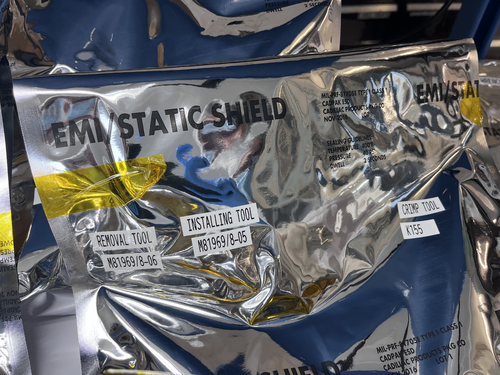
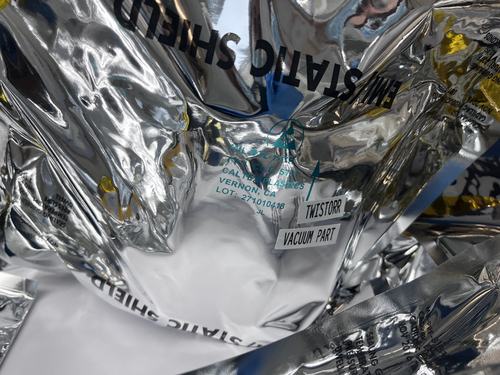
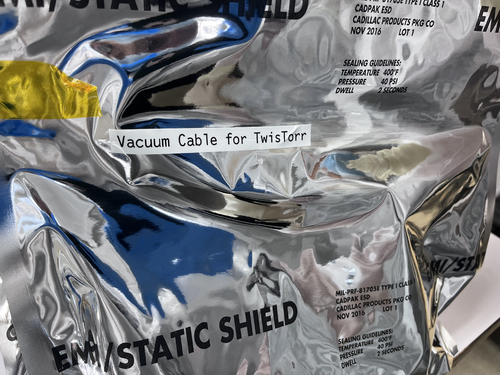
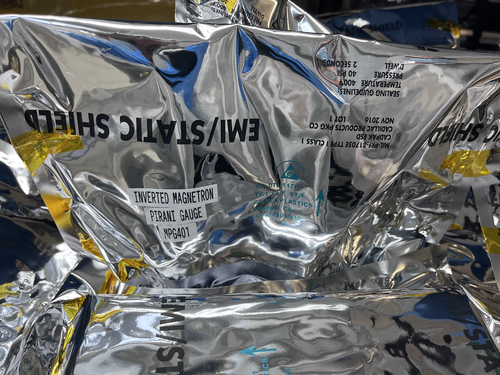
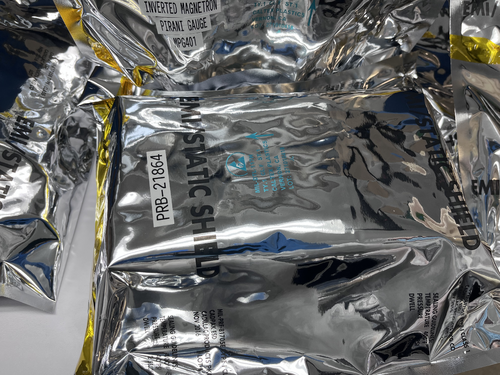
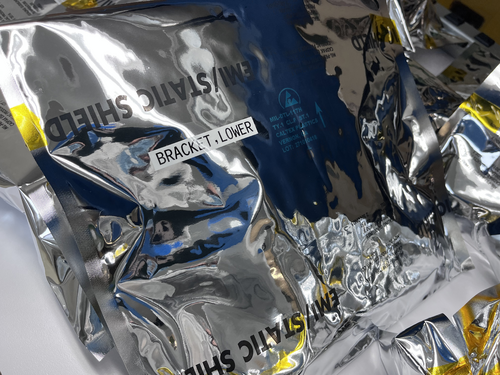
| Pamella and Julian wiped and tag system parts for the vacuum machine. We used isopropyl and vectra wipes in the most import pieces:
Inverted magnetron pirani gauge and the air cooling kit 81. The other parts we uses the IPA wipe for cleaning.
So for now we finished with ever system parts which was in the gabinetes.
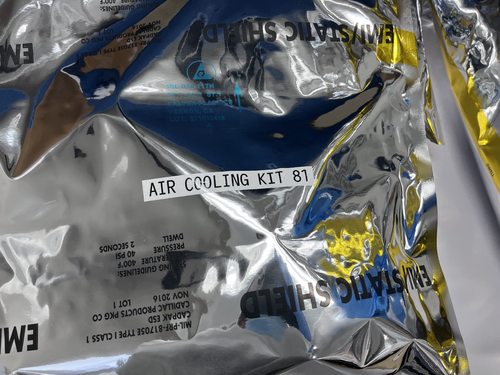
I put photos below. The photos is for all part we cleaning, tag and which puted inside the cleaning room. |
| Attachment 1: 645E597D-AEA6-4669-B967-08C82AA84D13.jpeg
|
|
| Attachment 2: 2669F0AC-69BC-422B-8723-AD047F3EBEB6.jpeg
|
|
| Attachment 3: 7731FE17-EDD2-46B4-B6E1-546531D98EC3.jpeg
|
|
| Attachment 4: F8921950-63C3-4E03-B79E-0A4C8EDB8EF6.jpeg
|
|
| Attachment 5: AA9374DB-377C-48BD-866B-D686AF945D09.jpeg
|
|
| Attachment 6: B3CE9D1E-A01E-4747-9F01-D427097F340C.jpeg
|
|
| Attachment 7: BAE63151-D3D1-41D9-881E-B6175544811C.jpeg
|
|
|
68
|
Tue Apr 11 17:56:15 2023 |
Pamella | Update | General | Lab cleaning |
| Today Pamella and Julian finished cleaning of the cleanroom, starting with the HEPA vacuuming, mopping and clearing all floor with IPA wipes. Also we wiped down some surfaces of the blue table, computer table and the top of chamber. |
|
71
|
Wed Apr 12 16:17:50 2023 |
shane | Update | General | Particle Counter moved |
| With the added height of the new docking station, the particle counter no longer fits under the Windows monitor in the electronics rack and has been moved to the desk in the corner of the lab. |
| Attachment 1: IMG_6693.HEIC
|
|
73
|
Wed Apr 19 17:39:50 2023 |
Pamella | Update | FLIR | FLIR project |
FLIR project updates- Initial tests
- 10:00: Starting test in position 2 cm to the black wall.
- Parameters : 0,305 A, 05,5 V and the temperature inside the mirrors 141,8°C.
- 10:23 Finished this first tried and take snap. The image is attached below.
- The name for the picture for this tried is “AcquisitionImage(Apr-19-2023_10 23)”.
- 10:37. Starting test in another position now 3 cm distance to the black wall ( this is more close than the original position.)
- Parameters : 0,348 A, 05,5 V and the temperature inside the mirrors 160,3°C.
- 10:57 Finished this second tried and take a snap. The image is attached below.
- The name for the picture for this tried is “AcquisitionImage(Apr-19-2023_10 57)”.
- 11:03 Starting test another position 1.3 cm distance to black wall.
- Parameters : 0,347 A, 05,5 V and the temperature inside the mirrors 158,7°C.
- 11:18 Finished this second tried and take a snap. The image is attached below.
- The name for the picture for this tried is “AcquisitionImage(Apr-19-2023_11 18)”.
The next step should be fix the problem with the shape (aluminum foil lid).
|
| Attachment 1: AcquisitionImage(Apr-19-2023_10_23)(1).jpg
|
(1).jpg.png)
|
| Attachment 2: AcquisitionImage(Apr-19-2023_10_57)_(1).jpg
|
_(1).jpg.png)
|
| Attachment 3: AcquisitionImage(Apr-19-2023_11_18)_(2).jpg
|
_(2).jpg.png)
|
|
74
|
Fri Apr 21 00:06:43 2023 |
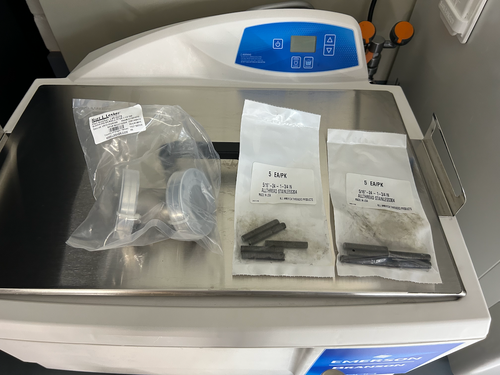
Jon | Update | VAC | Vacuum prep and installation - parts have arrived |
The two parts needed to complete the vacuum assembly (ELOG 70) have arrived.
- (10) 5/16"-24 x 1 3/4" threaded rods - for attaching the turbo pump reducing nipple to the CF 4.5" gate valve;
- (1) 45 degree CF 2.75" elbow for attaching the calibrated Ar/He leak to the chamber.
I left them laying on top of the ultrasonic washer. They both need to cleaned and baked following the standard procedure for stainless steel, as the threaded rods are visibly dirty. |
| Attachment 1: SS_parts.png
|
|
|
75
|
Fri Apr 21 15:21:18 2023 |
Pamella | Update | FLIR | |
FLIR project updates
- 01:50 pm: Starting test position 34 mm distance to black wall.
- Parameters : 0.100 A, 1.5 V and the temperature inside the mirrors 40°C.
- 2:09 pm : Finished the test and figured out this position it is too far the black wall so now we change for more close position.
- 2:17 pm: Starting test in another position: 10 mm distance to the black wall( this measurement is between the black wall and the aluminum lid)
- 2:26 pm : Finished this second tried and take a snap. The image is attached below.
- The name for the picture for this tried is “AcquisitionImage(Apr-21-2023_14 26)”.
Note: The second tried the temperature didn't up more than 40°C for 8 minutes so I change the current for a few seconds.
I started with 0.98 A with 1.7 V and up until 0.350 A with 2.5 V, just for a few seconds and in this way the temperature up to 72°C and I get the snap.
The next step should be understand the problem with the shape and work in changes for get the triangle in the FLIR image. |
| Attachment 1: AcquisitionImage(Apr-21-2023_14_26).jpg
|
.jpg.png)
|
|
76
|
Fri Apr 21 16:51:26 2023 |
Pamella | Update | General | Cleaning cables. |
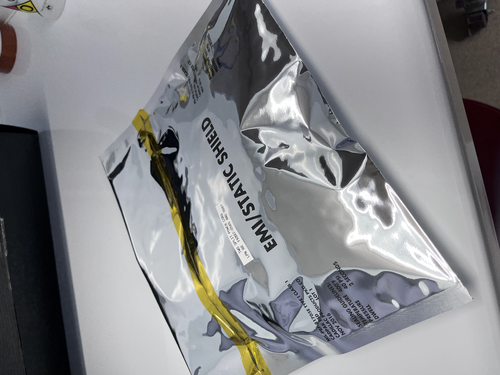
Cables for the vacuum system.
- Today i wiped, bagged and tagged two cables for the vacuum system. I used IPA wipes for cleaning this two split power cord. I attached a image below.
|
| Attachment 1: IMG_5416.jpeg
|
|
|
78
|
Tue Apr 25 11:56:37 2023 |
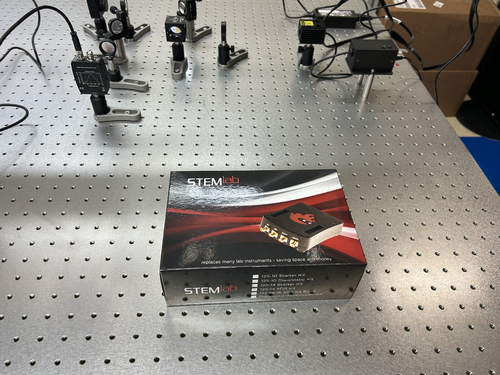
Jon | Update | VLC Electronics | Red Pataya has arrived |
| The Red Pataya 125-14 starter kit that we ordered for locking the 532 nm cavity has arrived. I left it laying on the optical table near the laser. |
| Attachment 1: Red_Pataya.jpg
|
|
|
79
|
Wed Apr 26 18:05:41 2023 |
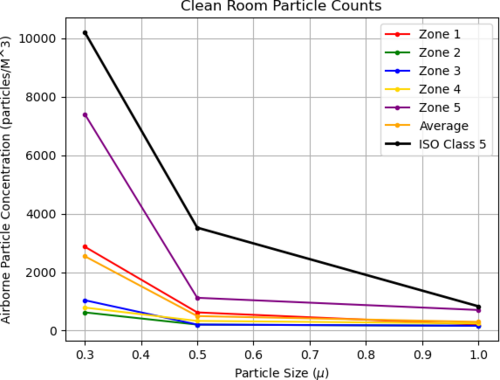
Pamella, Julian, Shane | Update | Cleanroom | cleanroom particle counts and cleaning log |
- pre-cleaning particle counts:
- zone 3
- 0.3 mu: 2494
- 0.5 mu: 748
- 1.0 mu 124
- zone 4
- 0.3 mu: 374
- 0.5 mu: 41
- 1.0 mu: 0
- 3:45 pm: Started wiping the surfaces(laser table,chamber, computer) inside the cleaning room.
- 4:05 pm: Finished wiped the surfaces
- 4:08 pm: Began vacuuming cleanroom floor
- 4:28 pm: Finished vacuuming cleanroom floor.
- 4:29 pm: Began mopping the cleanroom floor.
- 5:15 pm: Finished cleanroom clean.
- 6:00 pm: post-cleaning particle counts (full 5 zone measurement) attached below
|
| Attachment 1: counts4_26_23.png
|
|